Class last week Thursday, 21 June 2012 was AMAZING. Step by step, we were taken through the journey of creating our very own PhotoPolymer Plates. It is quite a process, but once grasped, there's no turning back.
I was running late to class late to class for the 1st time, (heading toward my 2nd time). -- But still, I wouldn't dare go through the entire class hungry.... LOL.. ---soooo right before class, I ran by Chipotle and got my trusty bowl made of brown rice, grilled chicken, lettuce and that tasty spicy red sauce my bottle of Poland Spring and I was off to class.

Of course the day I'm late, Mr. Faust began exactly on time and they were already at a paper cutter known as the guillotine, cutting our business cards down to size. I caught the end and we all received our business cards. After that, I finally got a chance to take a few bites, and next thing you know we're being called off to make our plates. I was still hungry so it was kind of hard to put my bowl down, but I managed....lol
The Guillotine & Finished Business Cards....
So the process is kinda of long winded so I'm pretty sure you don't want me to type every single step.-- well I don't have to anyway. After taking notes about every single step, I realized that the printed instructions were on the wall hanging above the PhotoPolymer Plate Maker... (GOOOOO ME!!!)
Transparency is needed to make the copies
After making 2 of the exact same copies of the selected image, this is what it should look like coming out of the copy machine
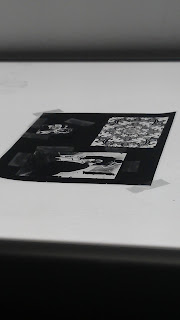
One copy is placed on the light table tape down the corners to minimize movement
Place a cut out of the 2nd copy of the selected image and place it directly over the image taped to the light table (They have to match as closely as possible)
The Big Thang here is the Exposure Unit you place the images in here in between two PhotoPolymer Plates
This is the PhotPolymer Plate after it finished drying
A set of completed plates. (there are 7 different images)
Here are the Directions, I placed them close to last because this is when I became aware of their existence...LOL

My Photopolymer Plate: I selected a wedding photo
This is a plate base that will make the Photopolymer Plates type high so we are able to use them to print
See...dnt they look great inked up.. :-)
Last But Certainly not least, the finished product!!!!
Meagan


.jpg)

.jpg)
.jpg)