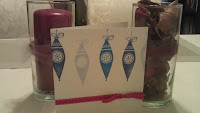
I gave this card to my former supervisor last year Christmas and she loved it. I thought it would be fun to share as a DIY. This is my my first time posting a DIY so please be gentle with me...LOL...
Sooooooooooooooooooooooooooooooooooooooo.....here we go!!!
Supplies Needed
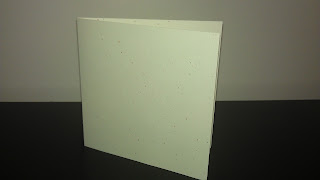
1 Piece of cut and scored cardstock measuring 6x6 (when folded)
1 6" piece of ribbon (to go across the card)
1 8" piece of ribbon (to tie the bow)
1 pair of scissors
Clear Hanging Ornament Stamps (of your choice)
Acrylic Stamping Block (size needed depends on stamps you choose)
Stamp Cleaner
Paper Towel
Step 1
Make sure you have all of your supplies. You don't want to have to go back and forth looking for things. (Scissors aren't pictured here)
Step 2
Begin with your already cut and scored cardstock (color & size of your choice) For this DIY we will be using a 6x6 card
Step 3
The real fun begins. You take your clear stamp that has been placed on your acyrlic block, ink it up (with the color/(s) of your choosing)
For this DIY I chose Danbue Blue, Bahama Blue, & Summer Sky From Memento
Step 4
Take your 6" piece of ribbon and place the adhesive on it
I used my Scotch 3M Advanced Tape Glider for this
After you place the adhesive or your 6" piece of ribbon you take your 8" piece of ribbon and place it about an inch from the right end of the 6" piece of ribbon
This will prepare you for the tying of the bow
I call it "The T before the bow tie"
Step 5
After you make "The T before the bow tie" you place it on the card about and inch above the bottom of the card with the 6" portion of the ribbon being horizontal and the 8" piece of ribbon lying vertically
Step 6
The final and last step. Here you get to tie the bow
Step 7
Always Remember to clean your tools!!!
And for an added treat.. The finished card next to some pretty candles at my house and the same DIY on a 5x7 card at my desk last year.
Anywho folks, I hope you will enjoy making this card as much as I did. Remember you can change ink colors, cardstock color, stamps, card sizes and ribbon colors. The choices are practically endless. Make this your own!!!
Share with me your thoughts and comments. If you would like to share how you made this card your own tweet me @DZignsbyMSDavis and #HolidayDIY ...
Hope to hear from you all Soon
Meagan


