As many of us know candles have been a go to for cost efficient decorations for quite some time now. Whether it be a wedding, baby shower, or another type of social event; there were candles somewhere to be found.
Although candles themselves may not be that expensive (depending on the type of candles you purchase) dressing them up, so they can be: "different," "unique," or "stand-out" to reflect your own personal taste can be. Now if followed exactly, you will be able to get 3 "Candle Dresses" from one $.69 sheet of Card Stock. I may not be a banker, but that sounds like a steal to me!
I was super eager to use my new punches after receiving them last week and thought this was the perfect craft for them!
Supplies
3 Votive Candles (top opening measure 1 7/8")
1 Set of Martha Stewart's Punch Around the Page Punches (choose what pattern suits you or the event best)
1 Punch All Over the Page Punch (choose what pattern suits you or the event best)
3 pieces of cardstock measuring 4"x 6 3/4"
Scotch 3M Tape Gun (or whatever adhesive works best with the paper you are using)
Craft Mat
From a 12 x 12 sheet of Card Stock cut 6 3/4" first. Then, you can turn the paper around and cut at 4 inches each time. This will leave you with 3, 4" x 6 3/4 pieces of paper.
Step 2
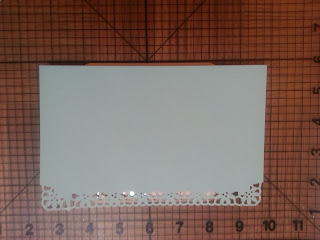
On top of your craft mat, take the corner punch of your Martha Stewart Punch Around the Page Punch and punch the two width corners of the page. (You will only need to do this to 2 corners at the top of the page)
Step 3
To link the pattern from corner to corner, take the other punch from the Punch Around the Page set and carefully line it up with the corner pattern as pictured. After you make the first punch using the corner as a guide, move to the other guide to continue to punch. You must make sure it lines up exactly with the guide or the pattern will not come out correctly. For a clearer explanation and to see it live in action, check out: http://www.youtube.com/watch?v=MXPmhG6uKGA .
After you've completed the pattern around the top part of the page, you can move on to the center of the page. Here you use your Punch All over the Page Punch to create a design in the center of the page. This will be the focal point because this is where the light from the candle will shine through.
Step 4
Take your Punch All Over The Page Punch. Separate the top from the bottom. Place the paper so the punch out will be at the center of your card stock. Use the grids! Line up the first punch with either the grid to the left or right (whichever side you would like to start with) and continue the pattern. I suggest you hold the paper after you've lined it up while attaching the magnet. The magnet connection is very strong and will cause your sheet of paper to move.


Step 5
With your card stock face side up, hold it securely and take your tape gun and apply it to the right side of the paper, starting just below the cut of of the corner pattern.
Step 6
Carefully roll your piece of card stock into a cylinder form placing the other edge over the side of paper with the adhesive.
Be sure to hold the edges together in place smoothing them out for about 15-20 seconds to make sure they stick and will stay in place.
Step 7
Safely light your candles, carefully place the candle dresses over them and enjoy!
Whether you want liven up your candles for a social event, the in-laws dropping by for an unexpected visit or a quiet dinner for two, you can customize them to fit you without breaking the bank!!!
So folks, what do you think? I would love to hear your thoughts. You can reply to this blog post or you can tag me on Twitter @TheGiftIsYours ... Don't forget to #MakeItMonday .. Show me your Monday Creation!!!!!


